Cloudflare Workers Backend
Note
The worker.dev domain is not accessible in China, please use a custom domain.
Click
Compute (Workers)->Workers & Pages->Create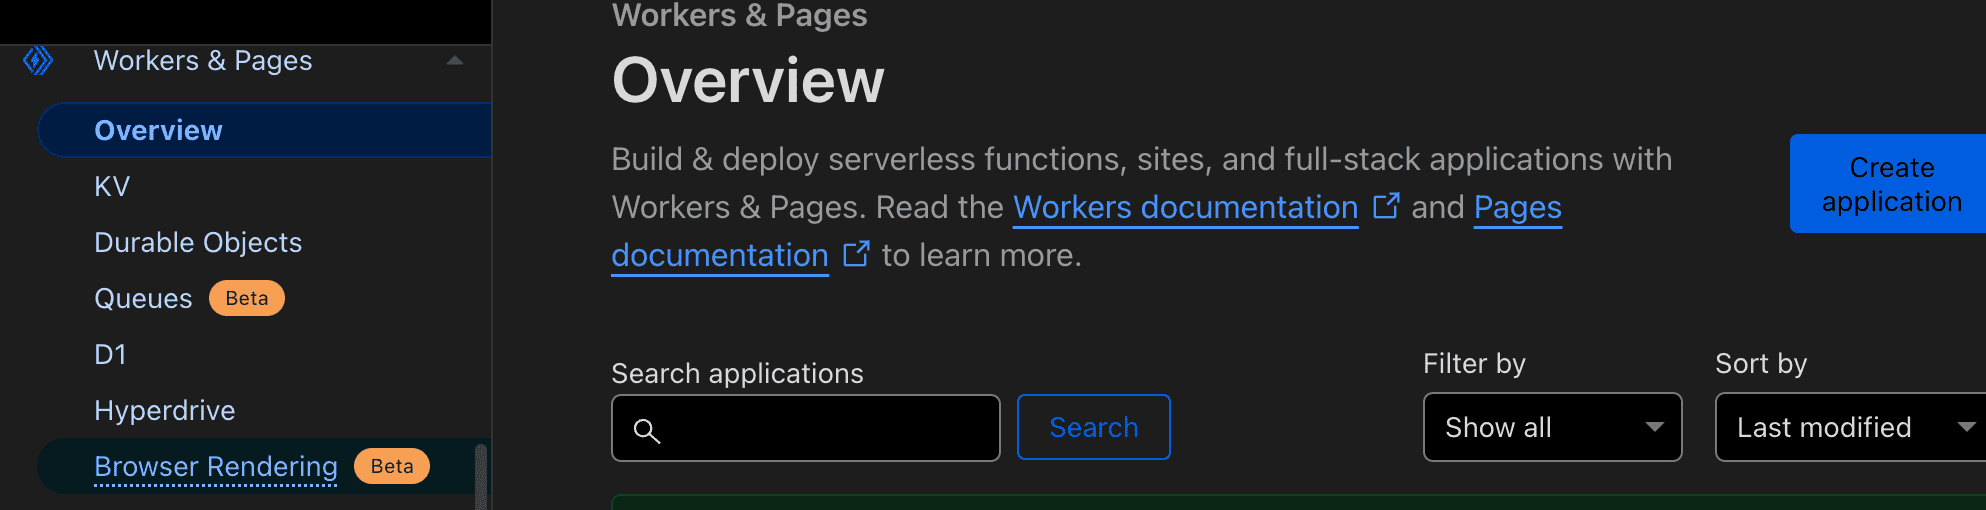
Select
Worker, clickCreate Worker, modify the name and then clickDeploy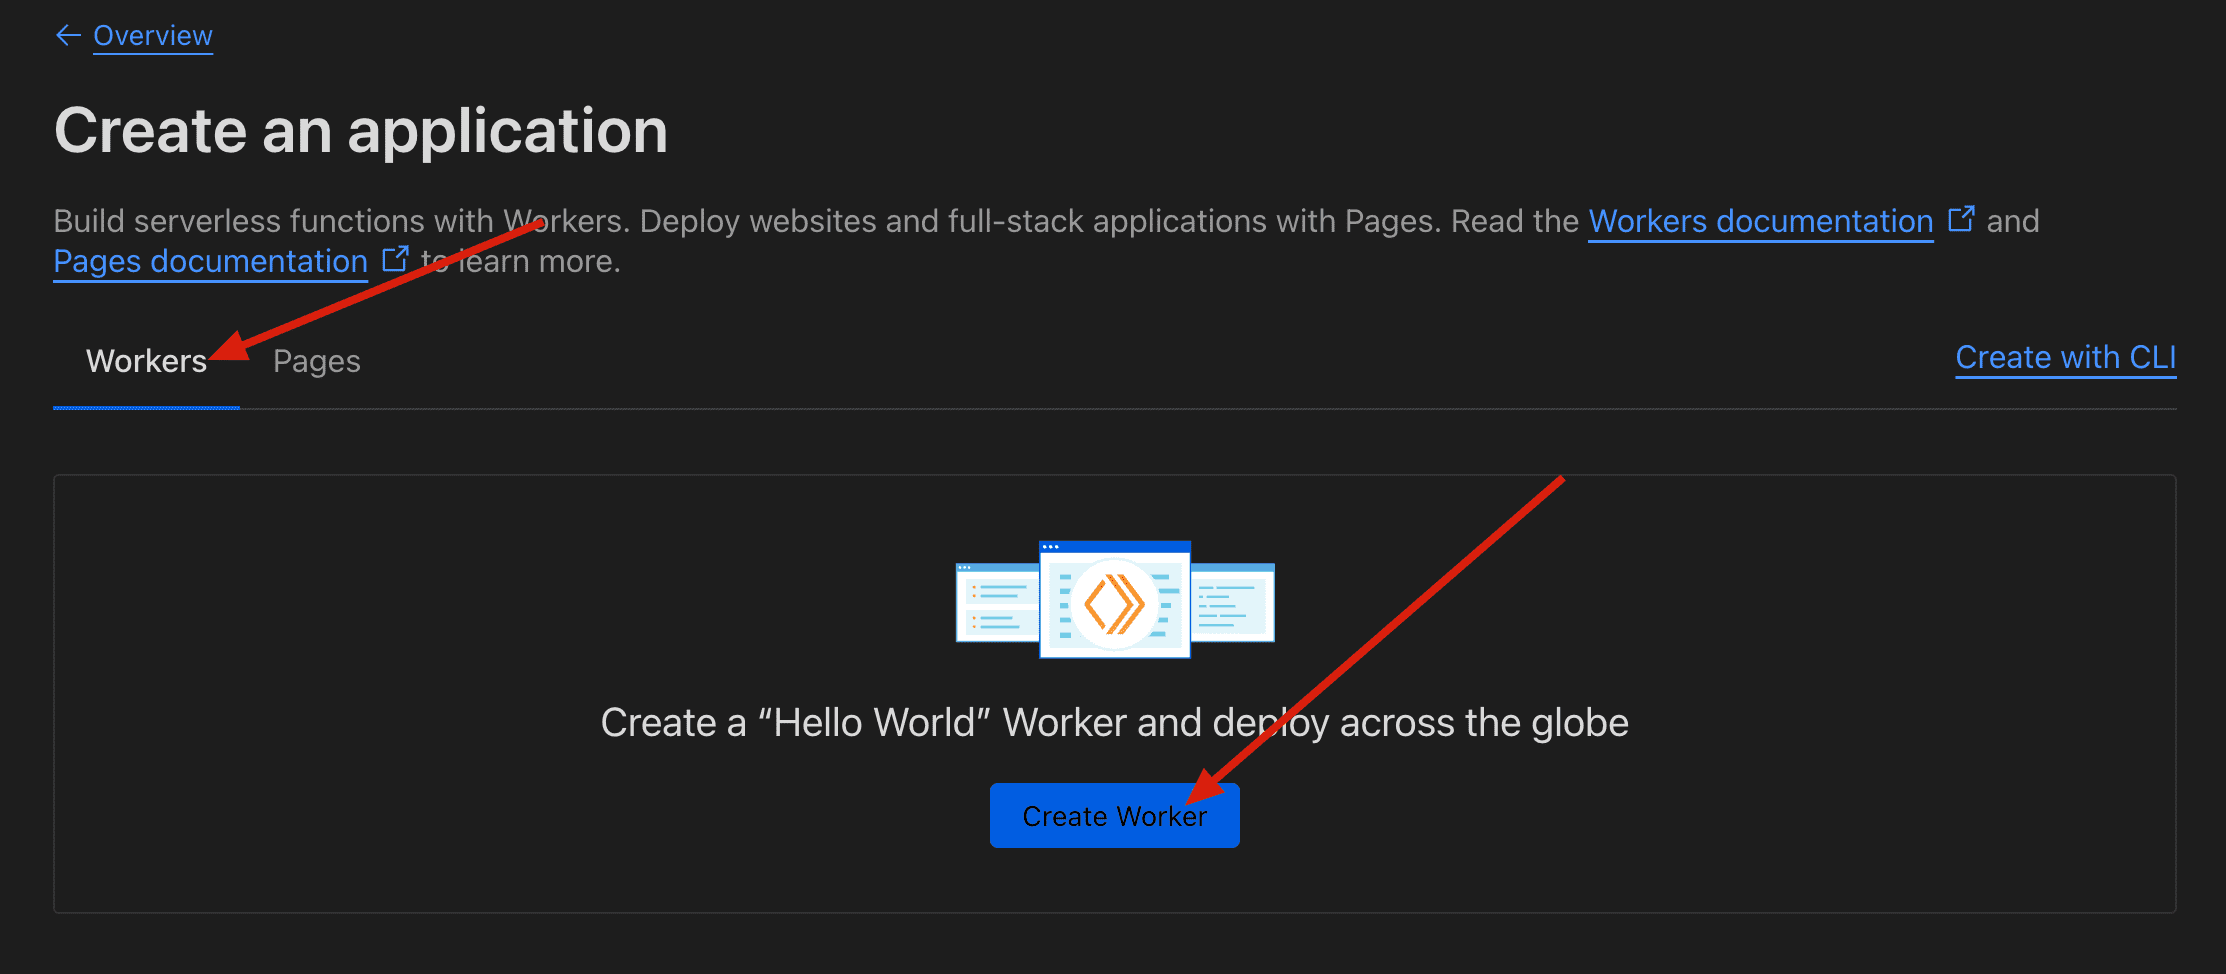
Go back to
Workers & Pages, find the worker you just created, clickSettings->Runtime, modifyCompatibility flags, manually addnodejs_compat, and the compatibility date also needs to be later than the date shown in the image.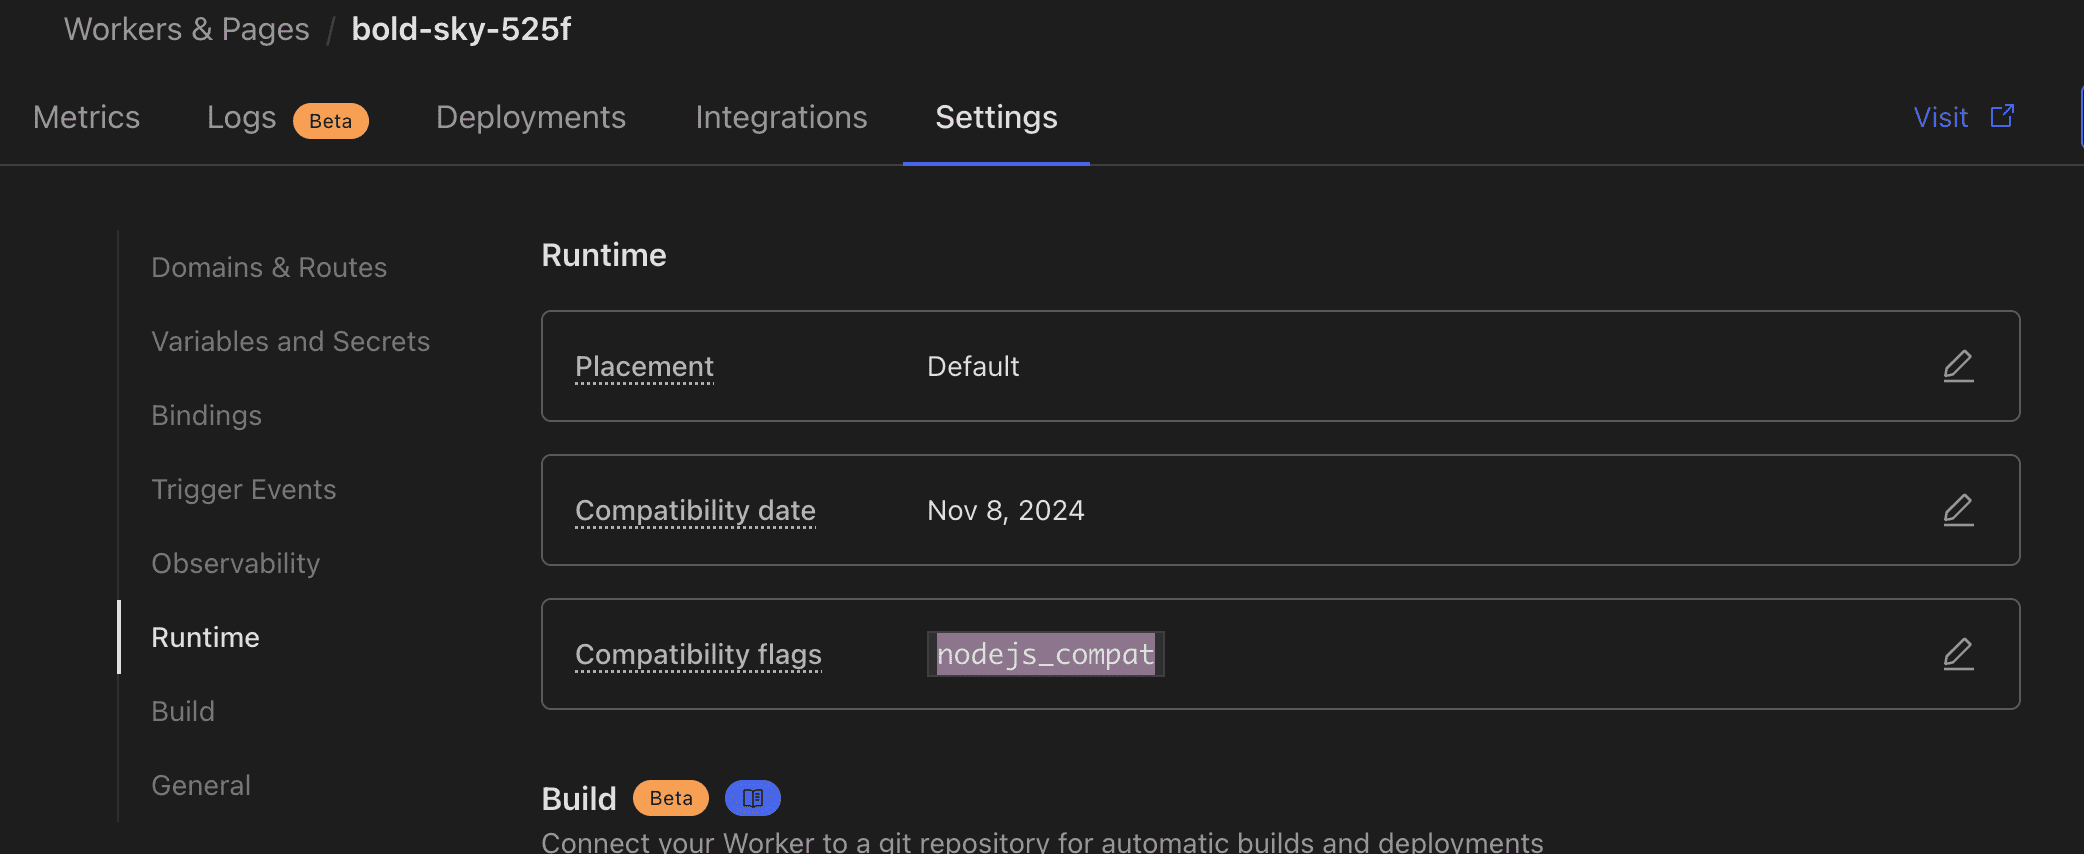
IMPORTANT
Add
nodejs_compatbefore deployingworker.js. Without this compatibility flag, common errors includeNo such module "path"andNo such module "node:stream", and the frontend may only showNetwork Error.Download worker.js
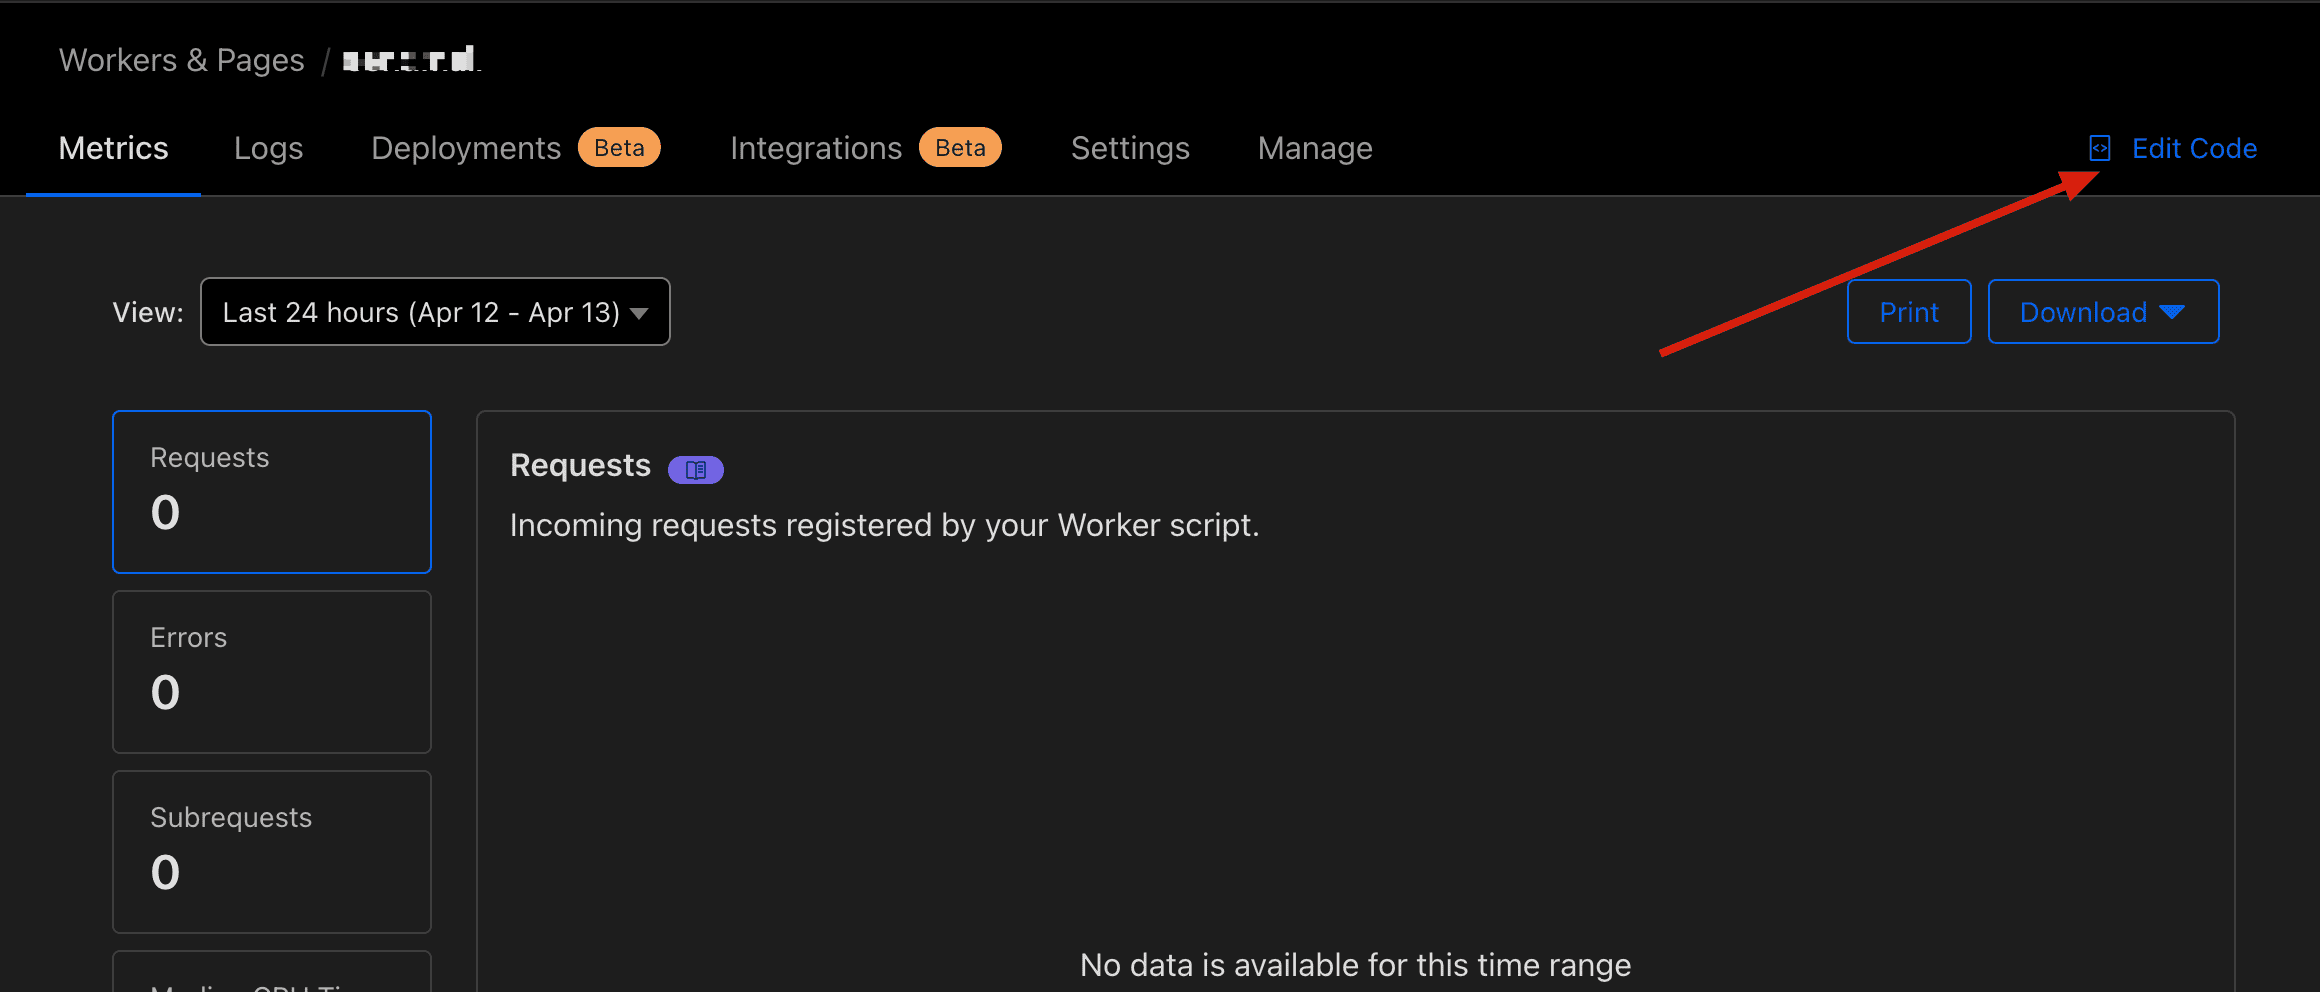
Go back to
Overview, find the worker you just created, clickEdit Code, delete the original file, uploadworker.js, and clickDeployNOTE
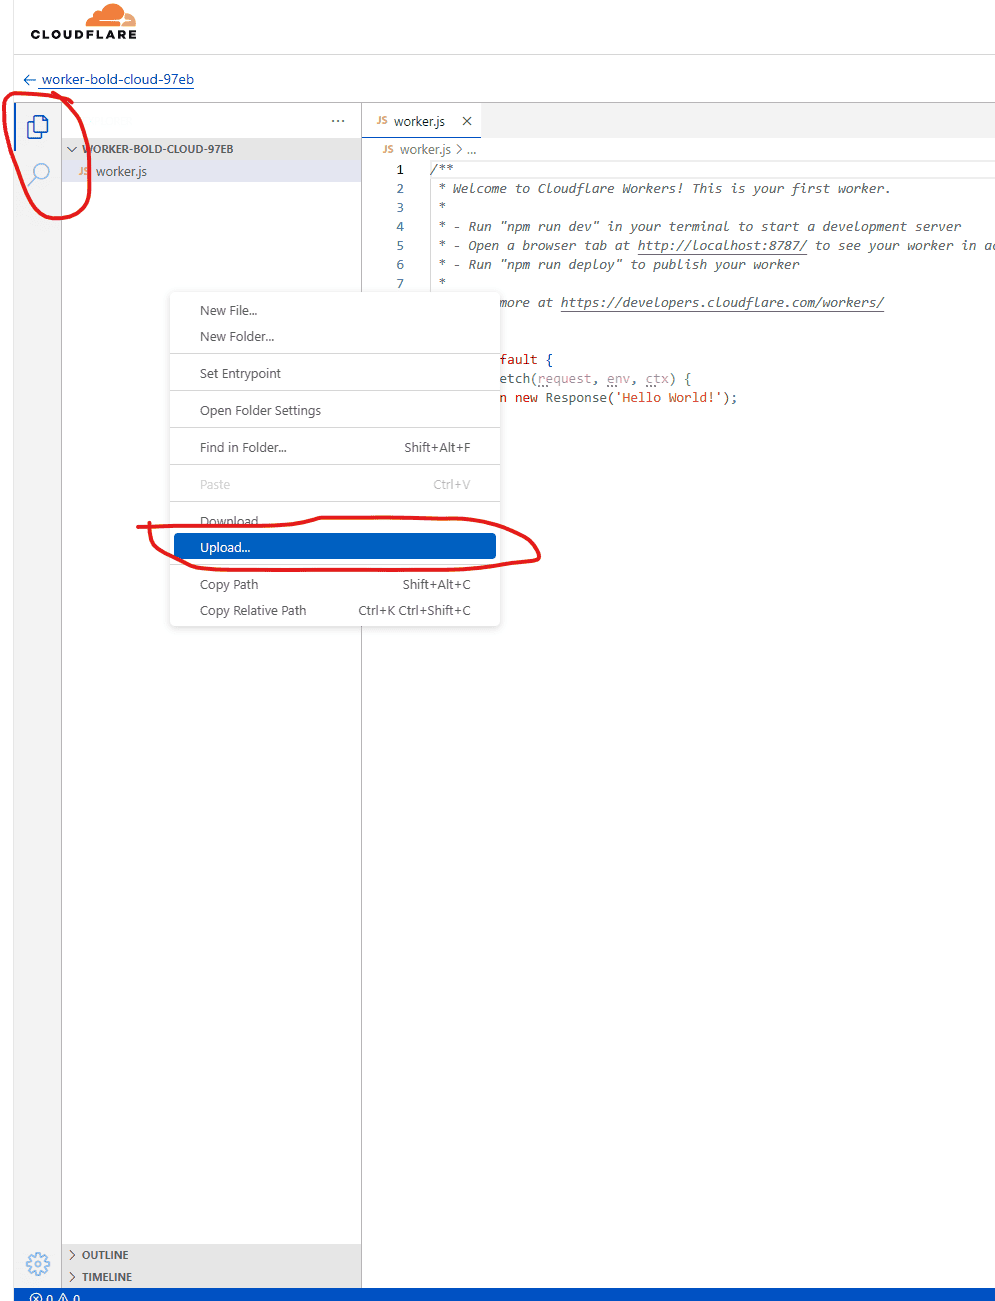
To upload, first click Explorer in the left menu, then right-click in the file list window and find
Uploadin the context menu, please refer to the screenshots below. Do not manually create a path such as\worker.jsin the editor. If saving fails withNo file system handle registered (\worker.js), go back to the Explorer file list, right-click upload the rootworker.js, and then clickDeploy.Reference: issues156
Click
Settings->Variables and Secrets, add variables as shown in the image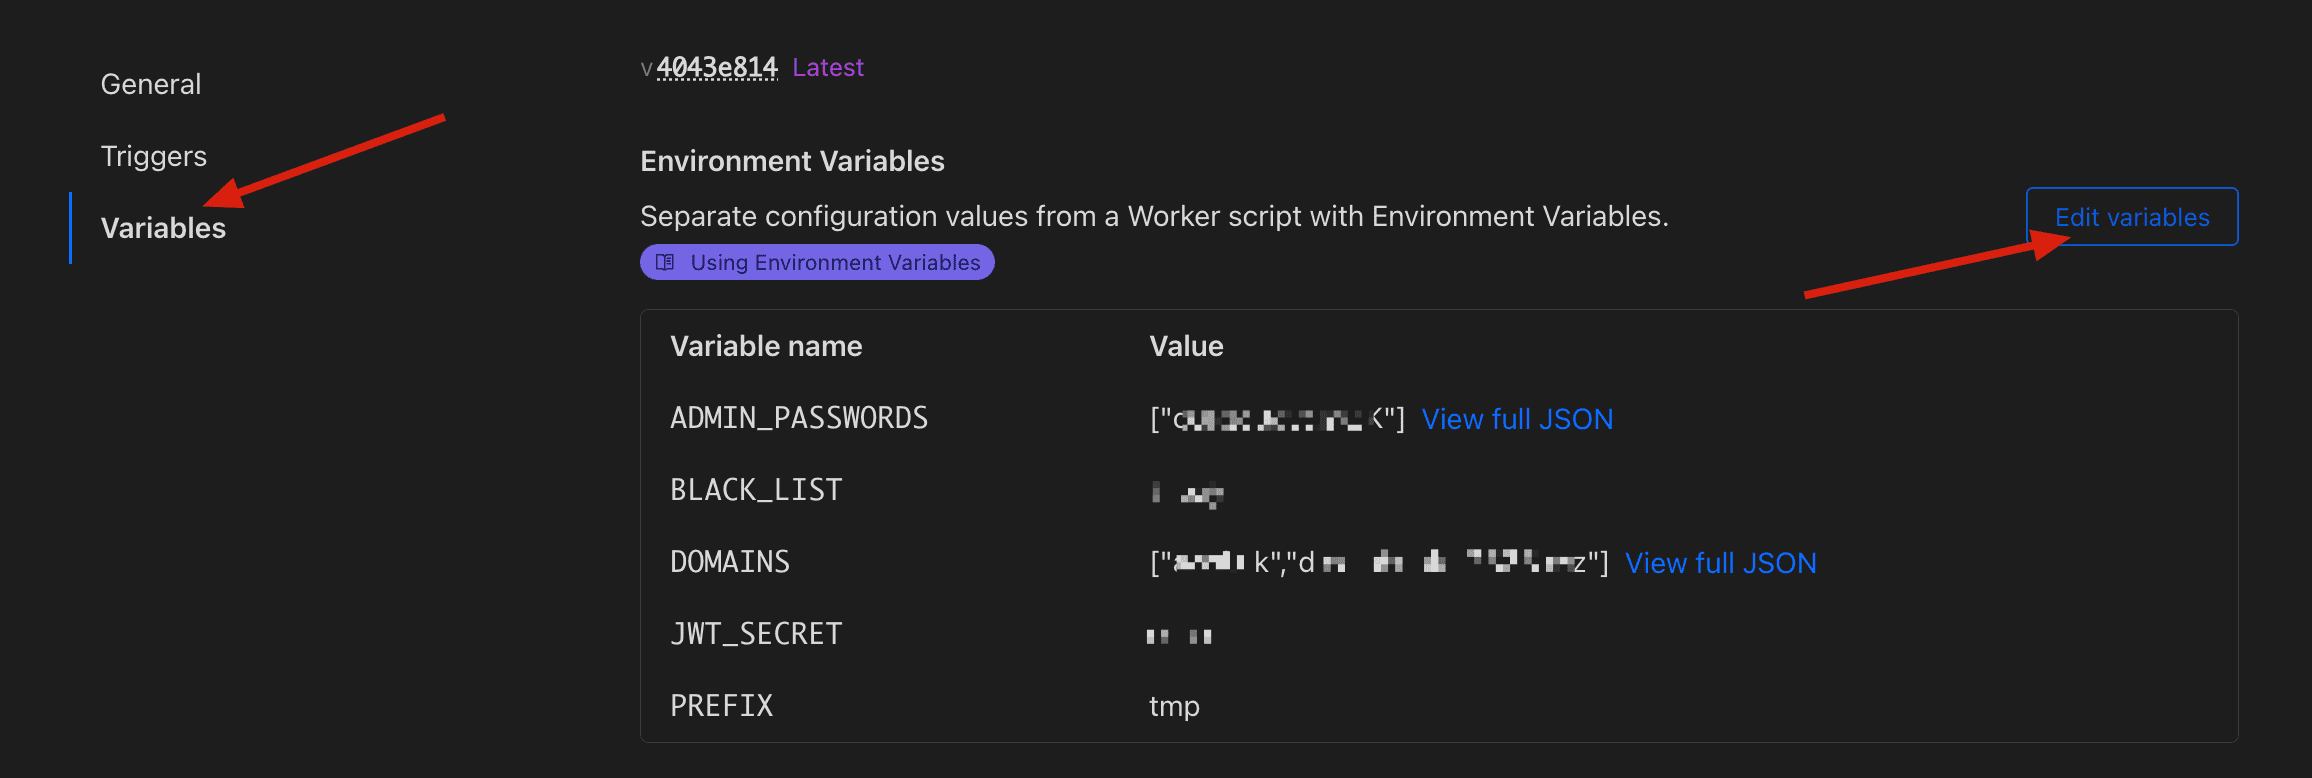
Note
For more variable configuration, please see Worker Variables Documentation
Note that the outermost quotes are not needed for string format variables
For
USER_ROLES, please configure in this format:[{"domains":["awsl.uk","dreamhunter2333.xyz"],"role":"vip","prefix":"vip"},{"domains":["awsl.uk","dreamhunter2333.xyz"],"role":"admin","prefix":""}]Recommended variable list
Variable Name Type Description Example PREFIXText Default prefix for new email names, can be omitted if no prefix needed tmpDOMAINSJSON All domains for temporary email, supports multiple domains ["awsl.uk", "dreamhunter2333.xyz"]JWT_SECRETText/Secret Secret for generating JWT, JWT is used for login and authentication xxxADMIN_PASSWORDSJSON Admin console password, console access not allowed if not configured ["123", "456"]ENABLE_USER_CREATE_EMAILText/JSON Whether to allow users to create emails, not allowed if not configured trueENABLE_USER_DELETE_EMAILText/JSON Whether to allow users to delete emails, not allowed if not configured trueClick
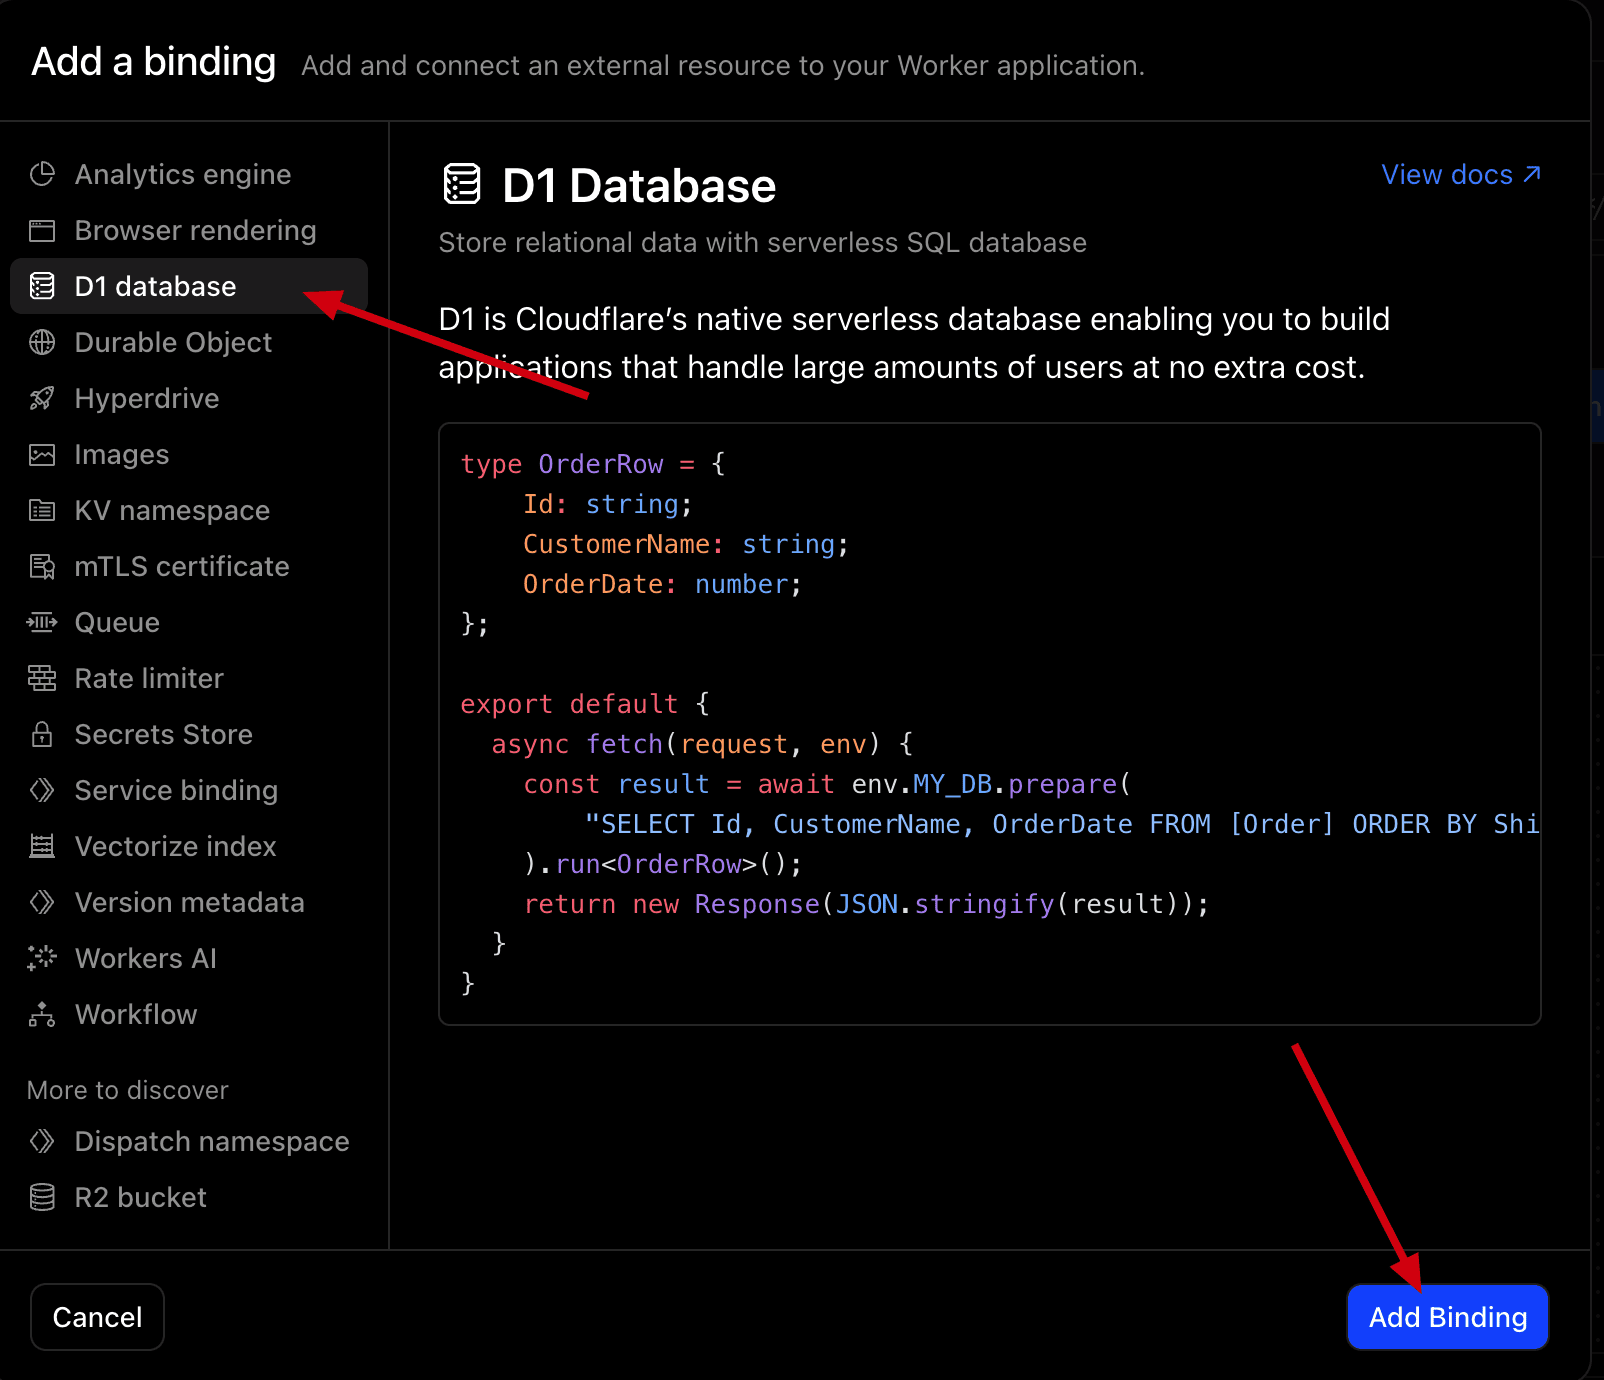
Settings->Bindings, clickAdd Binding, enter the name as shown, select the D1 database you just created, and clickAdd BindingImportant
Note that the binding name for
D1 Databasehere must beDBin uppercase. If the binding is nameddb,DATABASE, or anything else,/open_api/settingsand/admin/*will fail; common frontend symptoms are themapinitialization error orNetwork Error.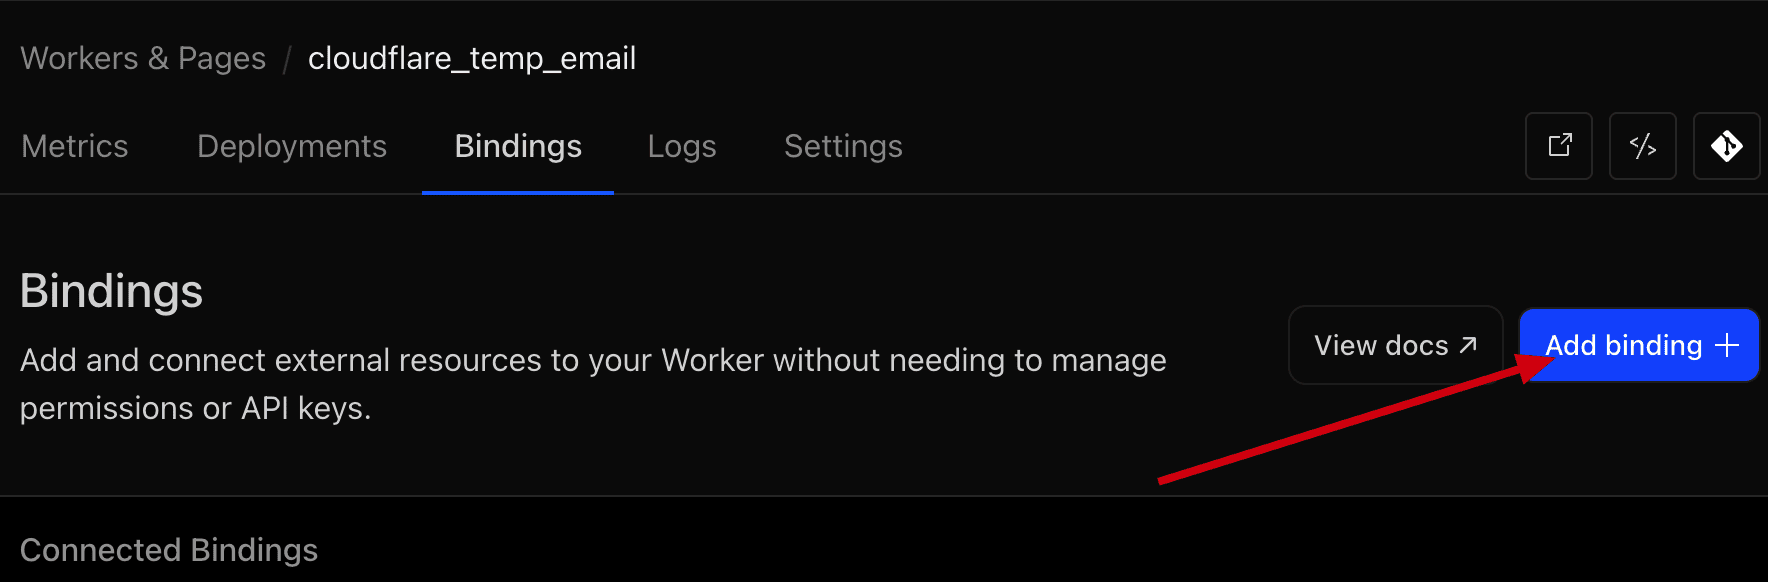

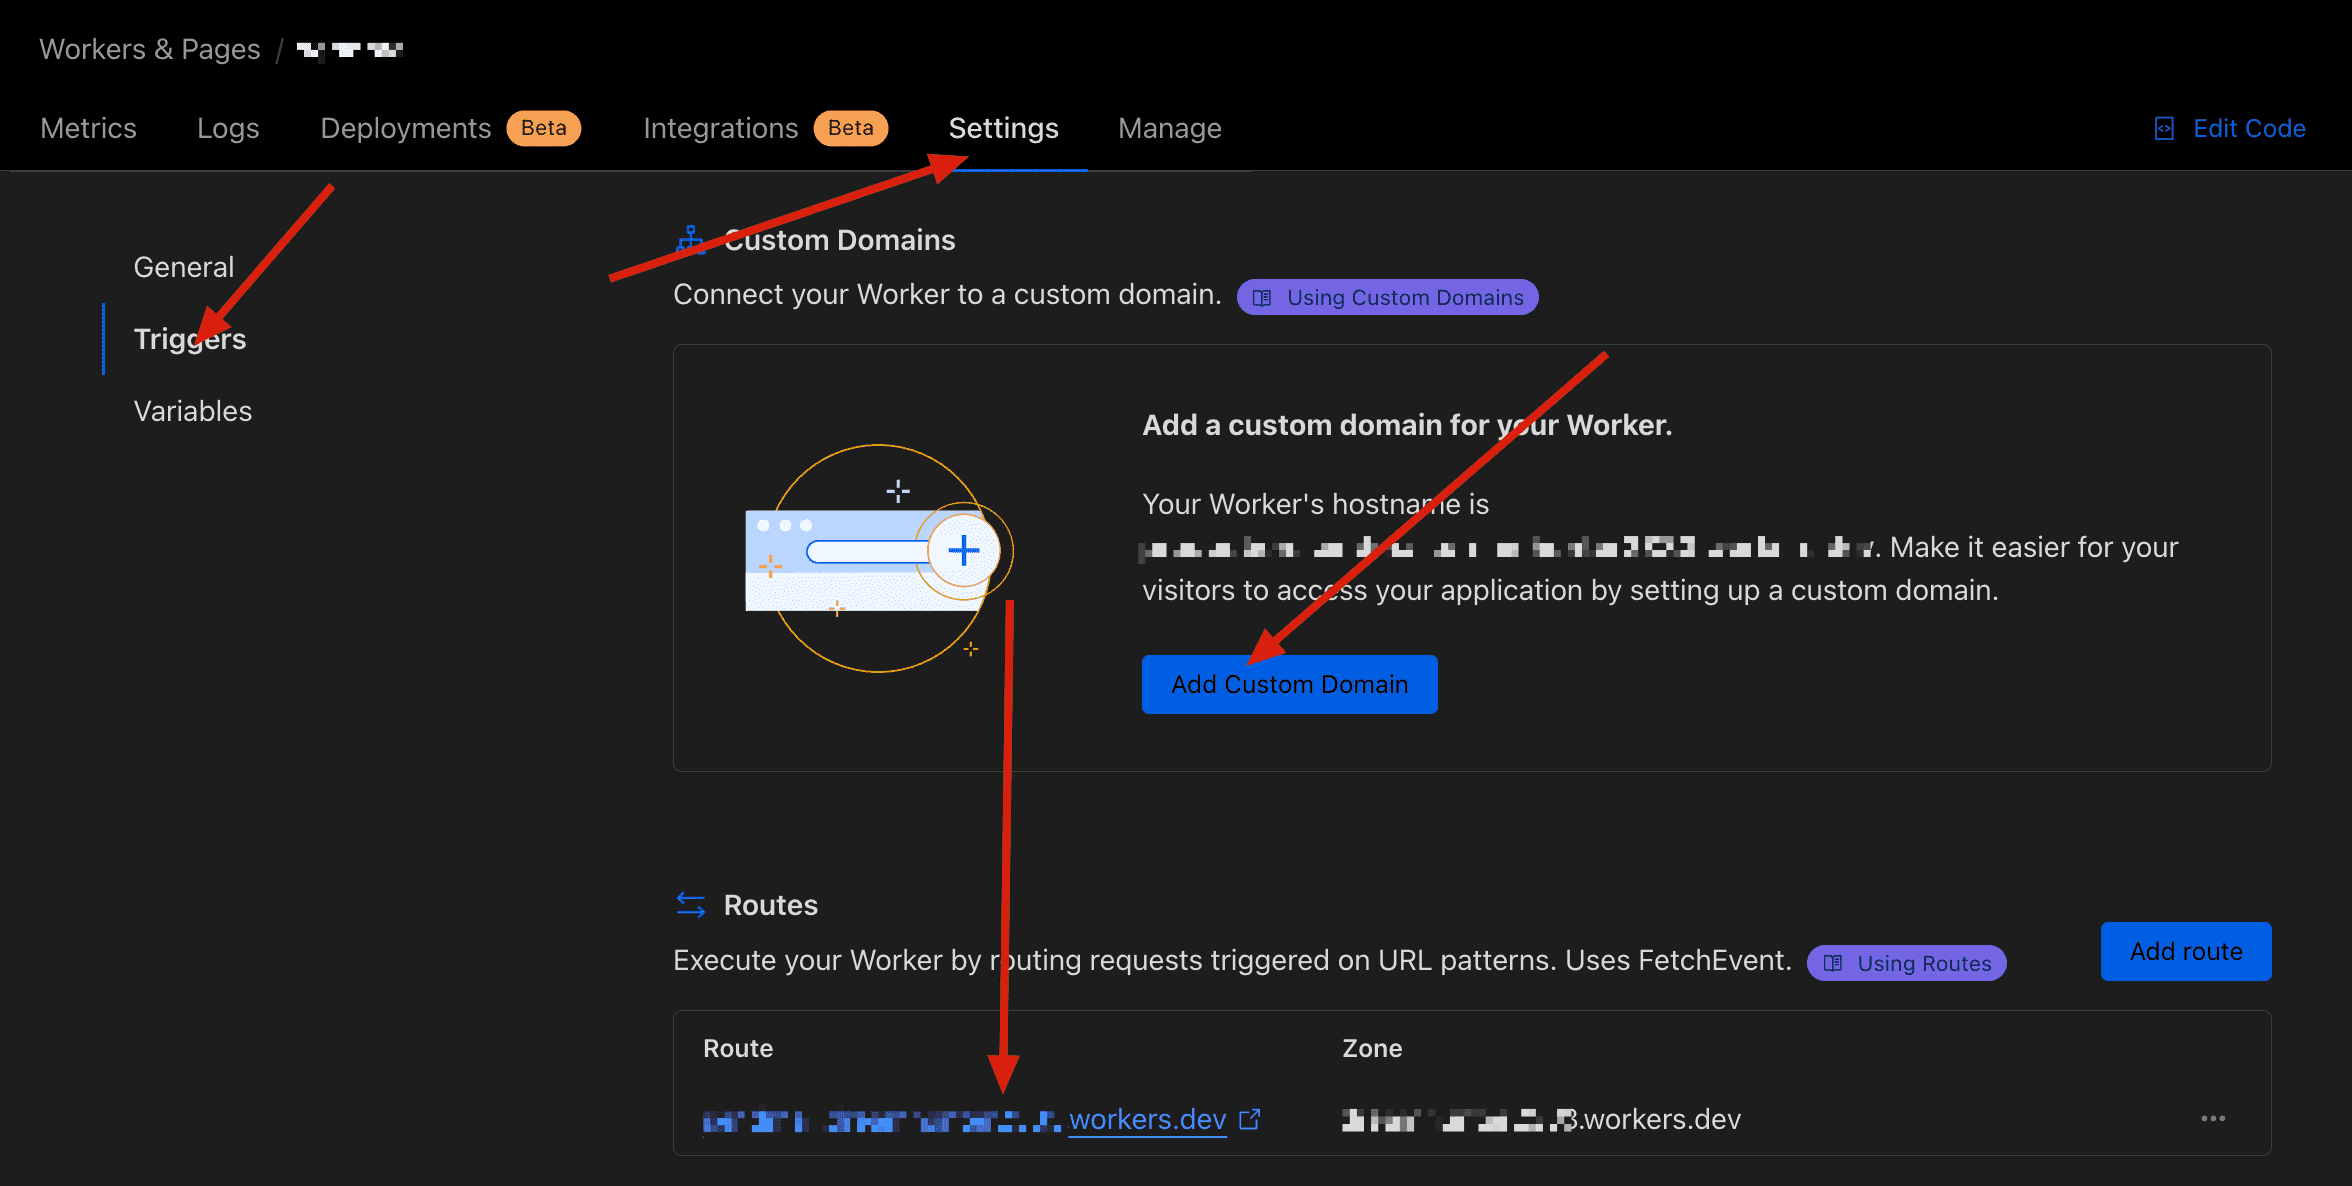
Click
Settings->Triggers, here you can add your own domain, or you can use the automatically generated*.workers.devdomain. Record this domain, as it will be needed when deploying the frontend later.NOTE
Open the
workerurl, if it displaysOK, the deployment is successfulOpen
/health_check, if it displaysOK, the deployment is successfulOpen
/open_api/settings; if it returns JSON, the public settings endpoint required by the frontend is working. Check this before deploying Pages.If you want to enable the user registration feature and need to send email verification, you need to create a
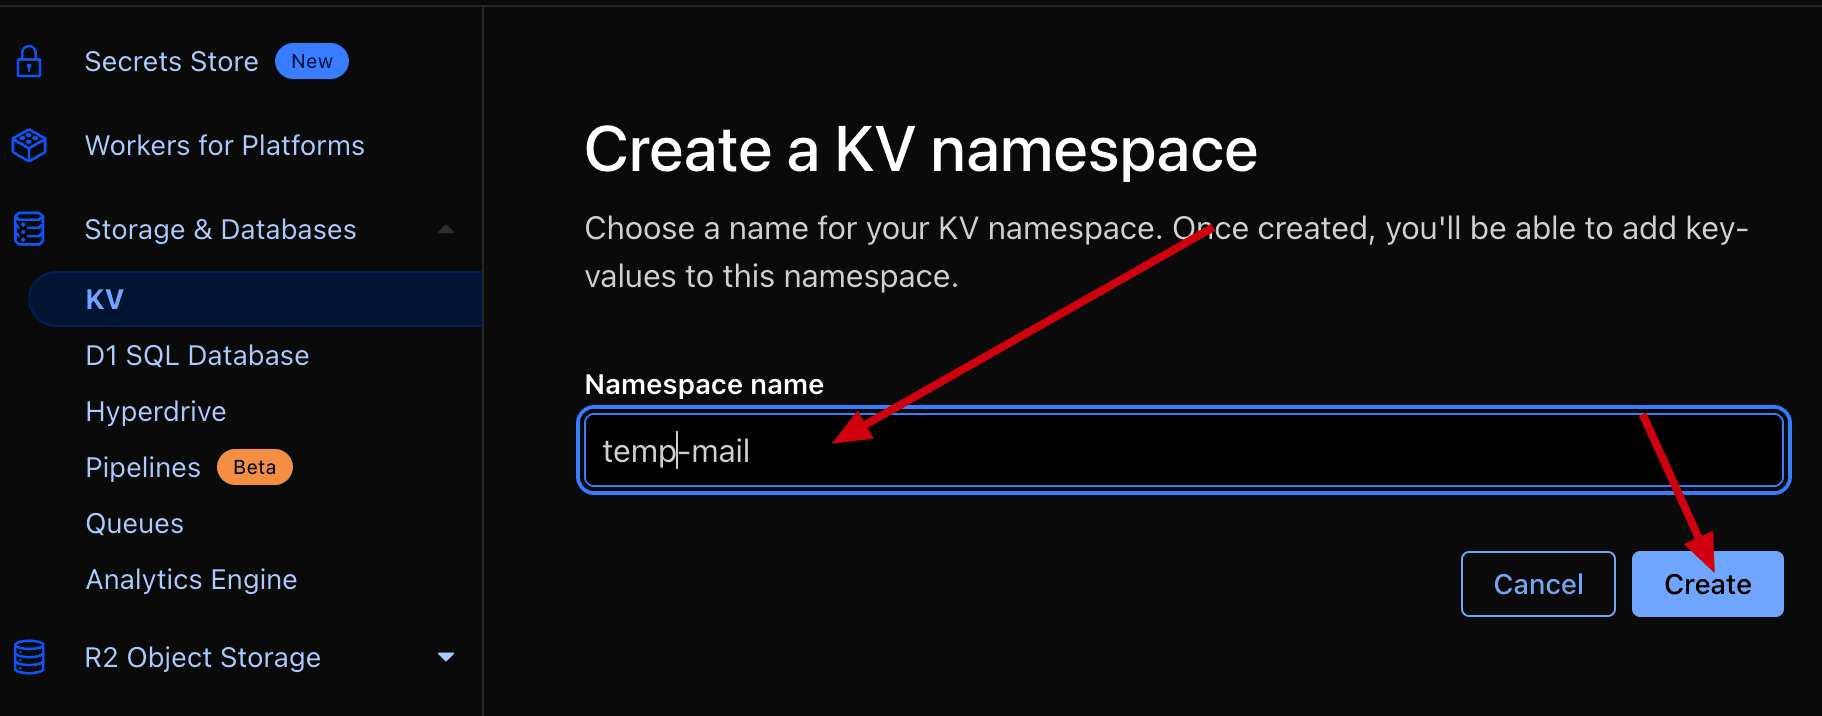
KVcache. You can skip this step if not needed.Important
If you want to enable the user registration feature and need to send email verification, you need to create a
KVcache. You can skip this step if not needed.Note that the binding name for
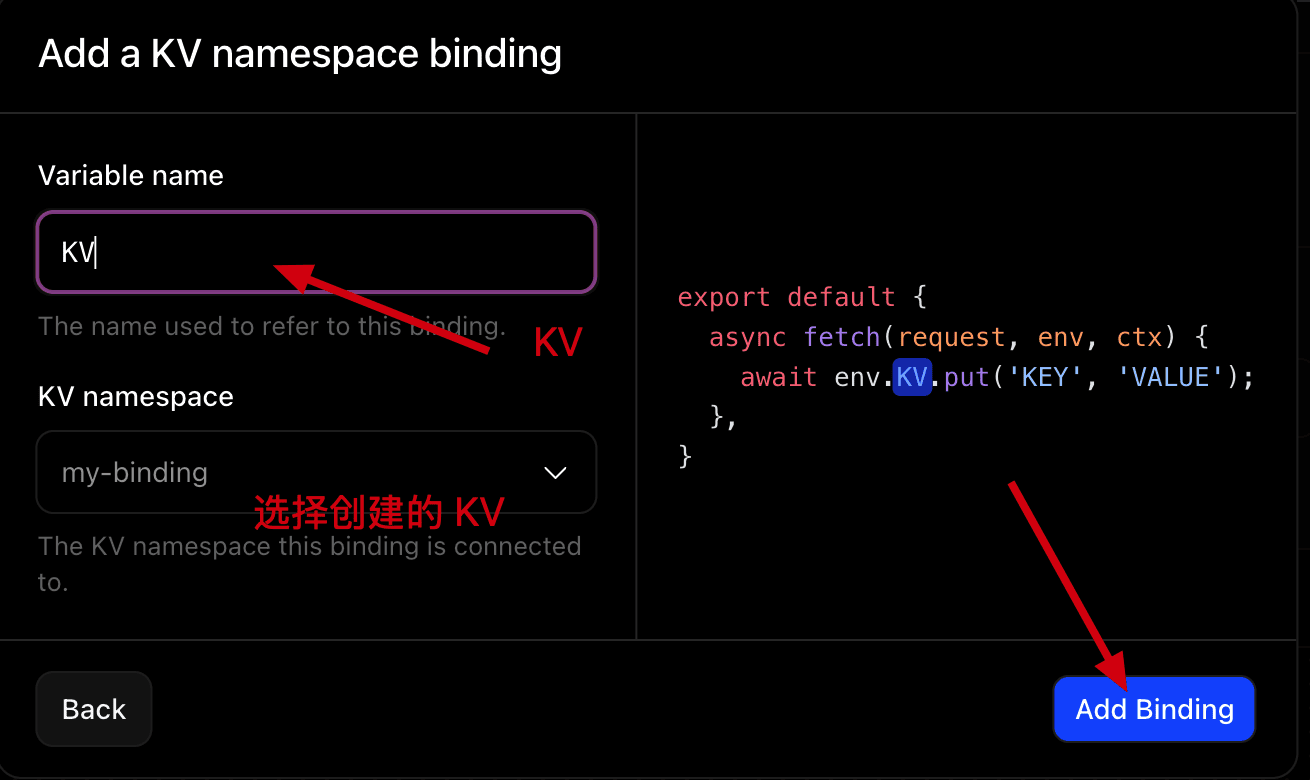
KVhere must beKVClick
Storage & Databases->KV->Create Namespace, as shown in the image, clickCreate Namespace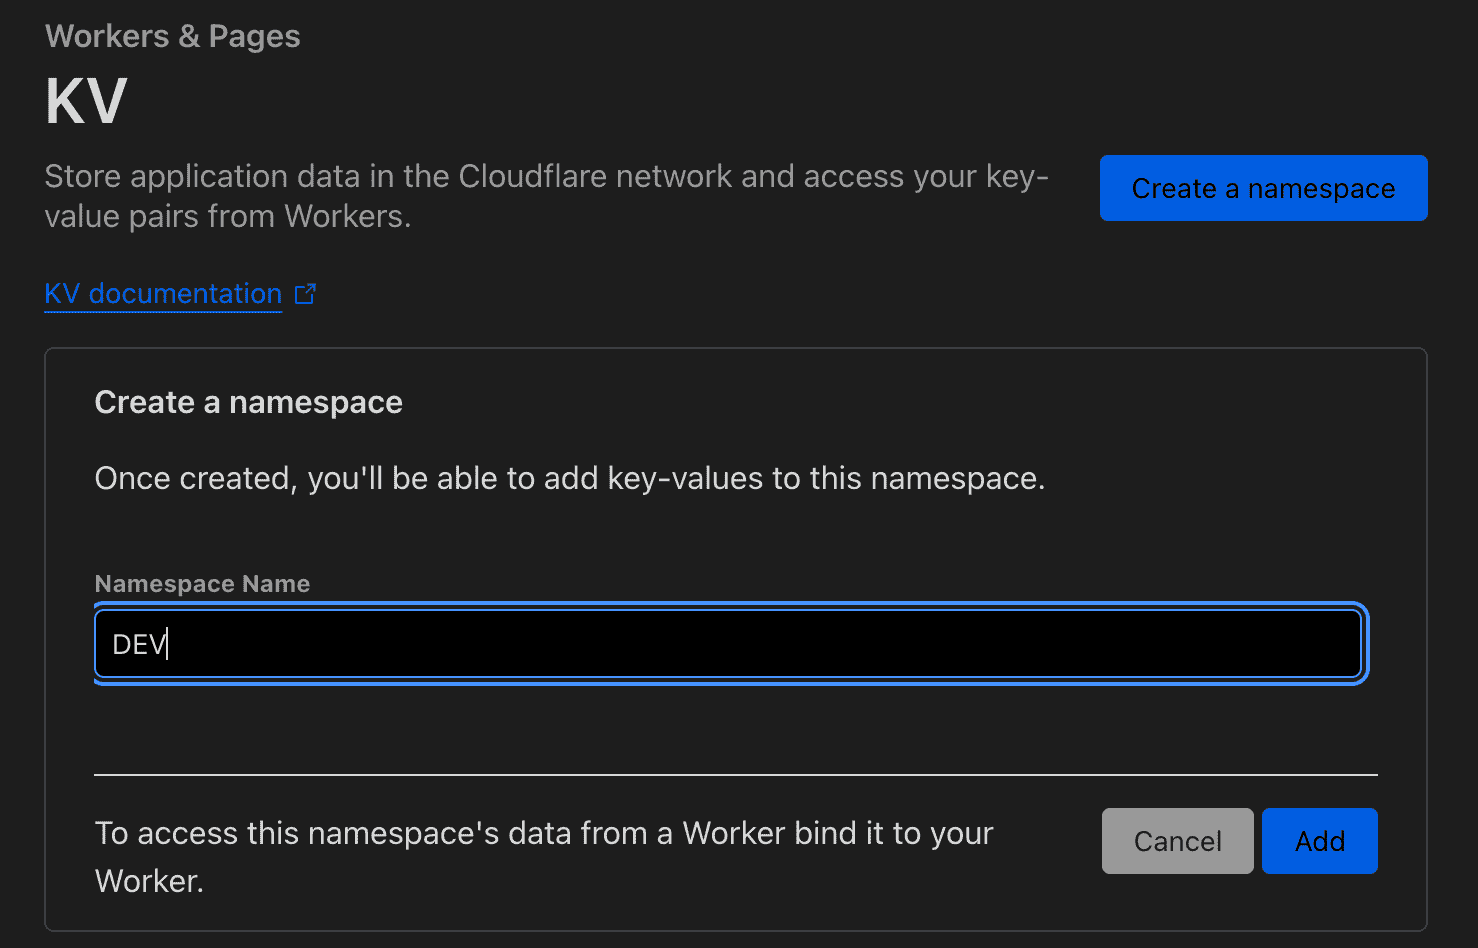
Then click
Settings->Bindings, clickAdd Binding, enter the name as shown, select the KV you just created, and clickAdd Binding
Telegram Bot Configuration
NOTE
If you don't need Telegram Bot, you can skip this step
Please first create a Telegram Bot, then get the
token, add thetokentoVariables and Secrets, variable name:TELEGRAM_BOT_TOKENIf you want to use the scheduled task to clean emails in the admin page, you need to add a scheduled task in
Settings->Trigger Events->Cron Triggers.NOTE
Select
cronexpression, enter0 0 * * *(this expression means run daily at midnight), clickAddto add. Please adjust this expression according to your needs.Enabling auto cleanup in the admin page is not enough by itself. You must add a Cron Trigger so the Worker's
scheduledevent actually runs. When D1 reaches its size limit, writes fail withD1_ERROR: Exceeded maximum DB size, new mails cannot be stored, and the symptom is "mail suddenly stops arriving; deleting a few mails makes it work again".