cloudflare temp email
This is a temporary email service that uses Cloudflare Workers to create a temporary email address and view the received email in web browser.
Features
- [x] Cloudflare D1 as a database
- [x] Deploy the front end with Cloudflare Pages
- [x] Deploy the backend with Cloudflare Workers
- [x] Email forwarding using Cloudflare Email Routing
- [x] Use password to login to the previous mailbox again.
- [x] Get Custom Name Email
- [x] Support multiple languages
- [x] Add access authorization, which can be used as a private site
- [x] Add auto reply feature
- [x] Add attachment viewing function
- [x] use rust wasm to parse email
- [x] support send email
- [x] support DKIM
Deploy
bash
npm install wrangler -g
git clone https://github.com/dreamhunter2333/cloudflare_temp_email.git
# Switch to the latest tag or the branch you want to deploy. You can also use the main branch directly.
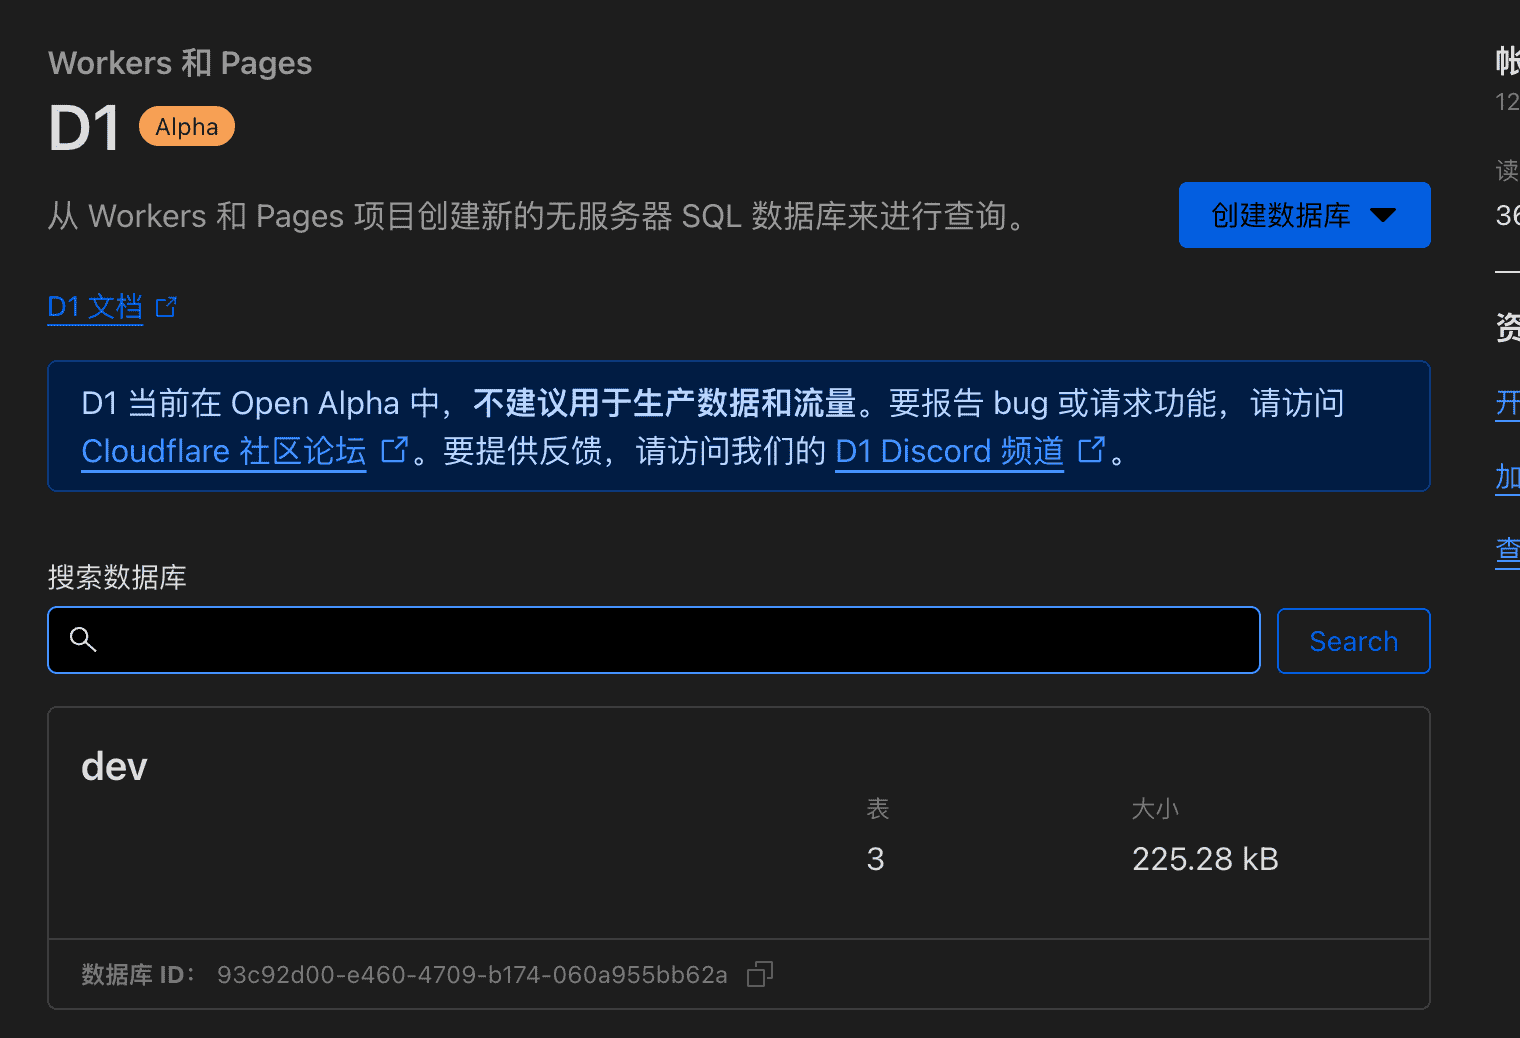
# git checkout $(git describe --tags $(git rev-list --tags --max-count=1))DB - Cloudflare D1
bash
# create a database, and copy the output to wrangler.toml in the next step
wrangler d1 create temp-email-db
wrangler d1 execute temp-email-db --file=db/schema.sql --remote
# schema update, if you have initialized the database before this date, you can execute this command to update
# wrangler d1 execute temp-email-db --file=db/2024-01-13-patch.sql --remote
# wrangler d1 execute temp-email-db --file=db/2024-04-03-patch.sql --remote
# create a namespace, and copy the output to wrangler.toml in the next step
wrangler kv:namespace create DEV
Use a D1 database name such as temp-email-db or cloudflare-temp-email-prod.
Backend - Cloudflare workers
The first deployment will prompt you to create a project. Please fill in production for the production branch.
bash
cd worker
pnpm install
cp wrangler.toml.template wrangler.toml
# deploy
pnpm run deploy
wrangler.toml
toml
name = "cloudflare_temp_email"
main = "src/worker.ts"
compatibility_date = "2024-09-23"
compatibility_flags = [ "nodejs_compat" ]

# enable cron if you want set auto clean up
# [triggers]
# crons = [ "0 0 * * *" ]

# send mail by cf mail
# send_email = [
#    { name = "SEND_MAIL" },
# ]

[vars]
# DEFAULT_LANG = "zh"
# TITLE = "Custom Title" # The title of the site
PREFIX = "tmp" # The mailbox name prefix to be processed
# (min, max) length of the adderss, if not set, the default is (1, 30)
# MIN_ADDRESS_LEN = 1
# MAX_ADDRESS_LEN = 30
# ANNOUNCEMENT = "Custom Announcement"
# always show ANNOUNCEMENT even no changes
# ALWAYS_SHOW_ANNOUNCEMENT = true
# address check REGEX, if not set, will not check
# ADDRESS_CHECK_REGEX = "^(?!.*admin).*"
# address name replace REGEX, if not set, the default is [^a-z0-9]
# ADDRESS_REGEX = "[^a-z0-9]"
# If you want your site to be private, uncomment below and change your password
# PASSWORDS = ["123", "456"]
# admin console password, if not configured, access to the console is not allowed
# ADMIN_PASSWORDS = ["123", "456"]
# warning: no password or user check for admin portal
# DISABLE_ADMIN_PASSWORD_CHECK = false
# admin contact information. If not configured, it will not be displayed. Any string can be configured.
# ADMIN_CONTACT = "[email protected]"
DEFAULT_DOMAINS = ["xxx.xxx1" , "xxx.xxx2"] # domain name for no role users
DOMAINS = ["xxx.xxx1" , "xxx.xxx2"] # all your domain name
# For chinese domain name, you can use DOMAIN_LABELS to show chinese domain name
# DOMAIN_LABELS = ["中文.xxx", "xxx.xxx2"]
# USER_DEFAULT_ROLE = "vip" # default role for new users(only when enable mail verification)
# ADMIN_USER_ROLE = "admin" # the role which can access admin panel
# User roles configuration, if domains is empty will use default_domains, if prefix is null will use default prefix, if prefix is empty string will not use prefix
# USER_ROLES = [
#    { domains = ["xxx.xxx1" , "xxx.xxx2"], role = "vip", prefix = "vip" },
#    { domains = ["xxx.xxx1" , "xxx.xxx2"], role = "admin", prefix = "" },
# ]
JWT_SECRET = "xxx" # Key used to generate jwt
BLACK_LIST = "" # Blacklist, used to filter senders, comma separated
# Allow users to create email addresses
ENABLE_USER_CREATE_EMAIL = true
# Disable anonymous user create email, if set true, users can only create email addresses after logging in
# DISABLE_ANONYMOUS_USER_CREATE_EMAIL = true
# Allow users to delete messages
ENABLE_USER_DELETE_EMAIL = true
# Allow automatic replies to emails
ENABLE_AUTO_REPLY = false
# Allow webhook
# ENABLE_WEBHOOK = true
# Footer text
# COPYRIGHT = "Dream Hunter"
# DISABLE_SHOW_GITHUB = true # Disable Show GitHub link
# DISABLE_SHOW_GITHUB_FOR_USER = true # Hide GitHub link for normal users only
# default send balance, if not set, it will be 0
# DEFAULT_SEND_BALANCE = 1
# the role which can send emails without limit, multiple roles can be separated by ,
# NO_LIMIT_SEND_ROLE = "vip"
# Turnstile verification configuration
# CF_TURNSTILE_SITE_KEY = ""
# CF_TURNSTILE_SECRET_KEY = ""
# telegram bot
# TG_MAX_ADDRESS = 5
# telegram bot info, predefined bot info can reduce latency of the webhook
# TG_BOT_INFO = "{}"
# global forward address list, if set, all emails will be forwarded to these addresses
# FORWARD_ADDRESS_LIST = ["[email protected]"]
# Frontend URL
# FRONTEND_URL = "https://xxxx.xxx"
# Enable check junk mail
# ENABLE_CHECK_JUNK_MAIL = false
# junk mail check list, if status exists and status is not pass, will be marked as junk mail
# JUNK_MAIL_CHECK_LIST = = ["spf", "dkim", "dmarc"]
# junk mail force check pass list, if no status or status is not pass, will be marked as junk mail
# JUNK_MAIL_FORCE_PASS_LIST = ["spf", "dkim", "dmarc"]
# remove attachment if size exceed 2MB, mail maybe mising some information due to parsing
# REMOVE_EXCEED_SIZE_ATTACHMENT = true
# remove all attachment, mail maybe mising some information due to parsing
# REMOVE_ALL_ATTACHMENT = true

[[d1_databases]]
binding = "DB"
database_name = "xxx" # D1 database name
database_id = "xxx" # D1 database ID

# kv config for send email verification code
# [[kv_namespaces]]
# binding = "KV"
# id = "xxxx"

# Create a new address current limiting configuration
# [[unsafe.bindings]]
# name = "RATE_LIMITER"
# type = "ratelimit"
# namespace_id = "1001"
# # 10 requests per minute
# simple = { limit = 10, period = 60 }
you can find and test the worker's url in the workers dashboard
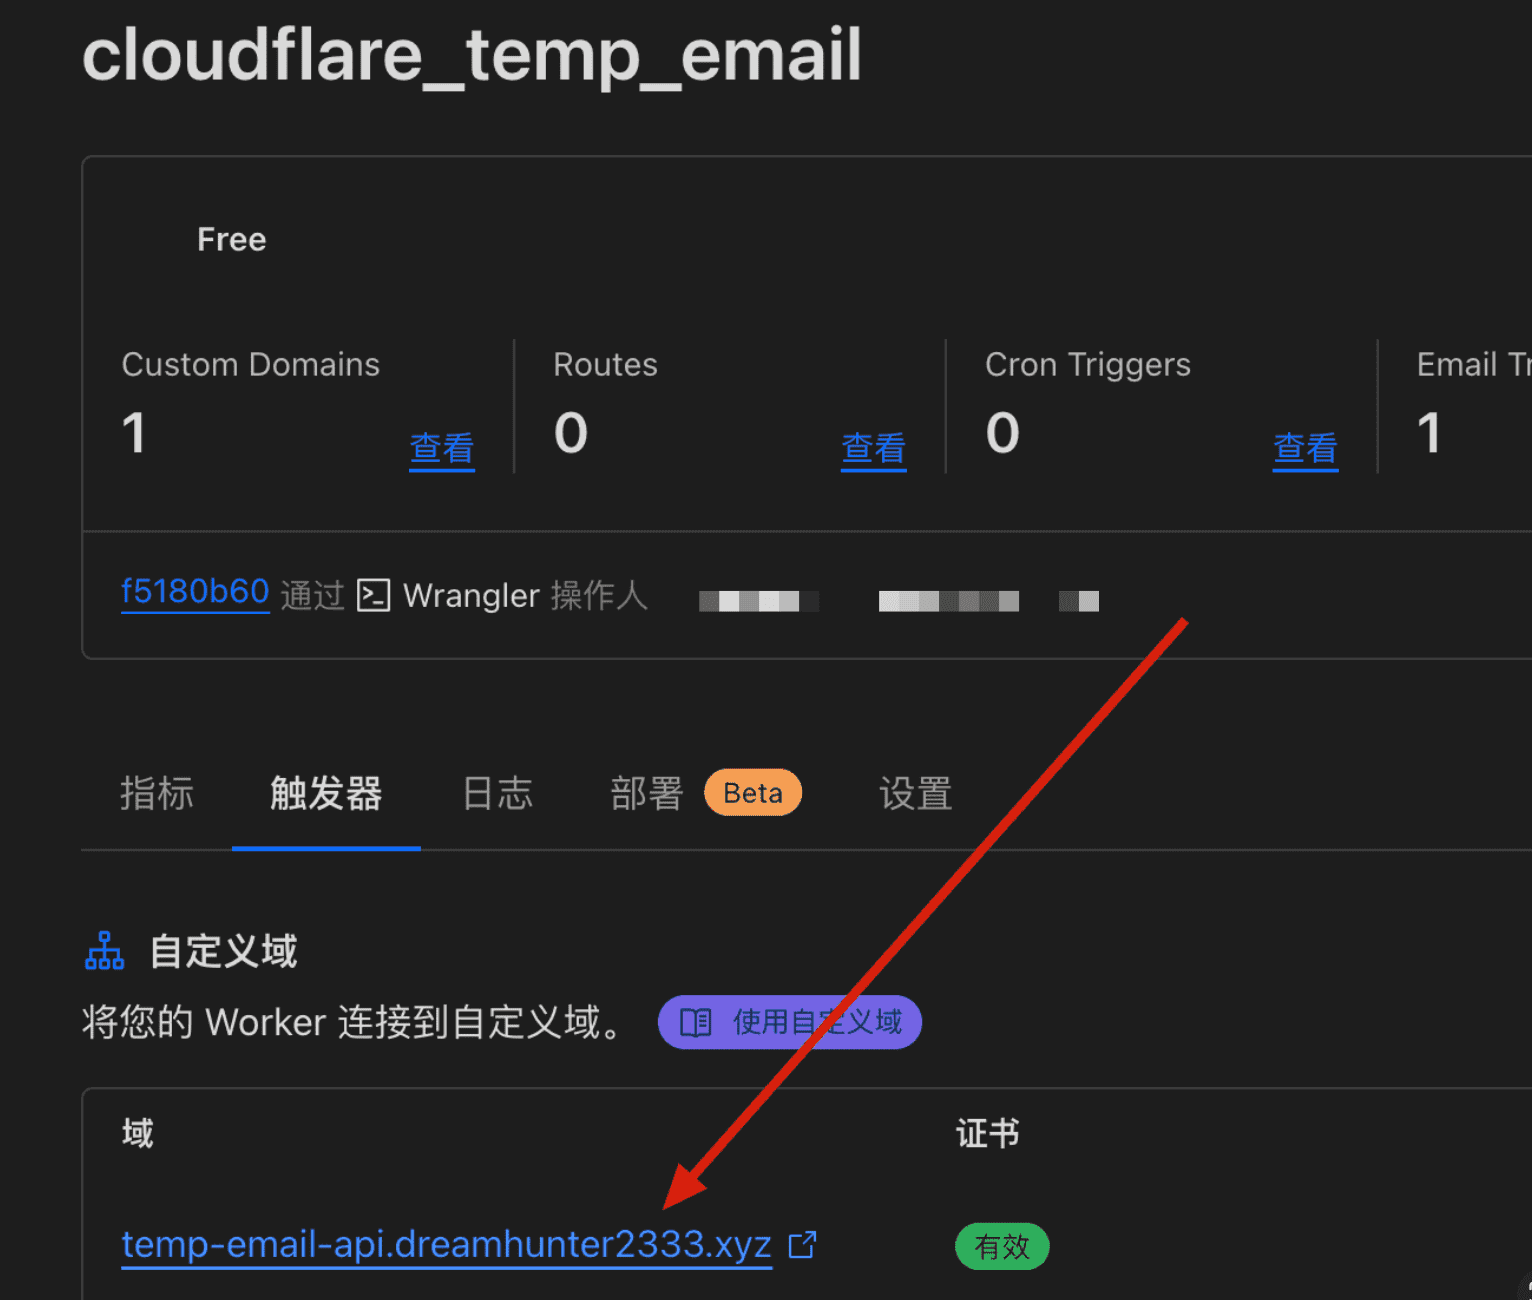
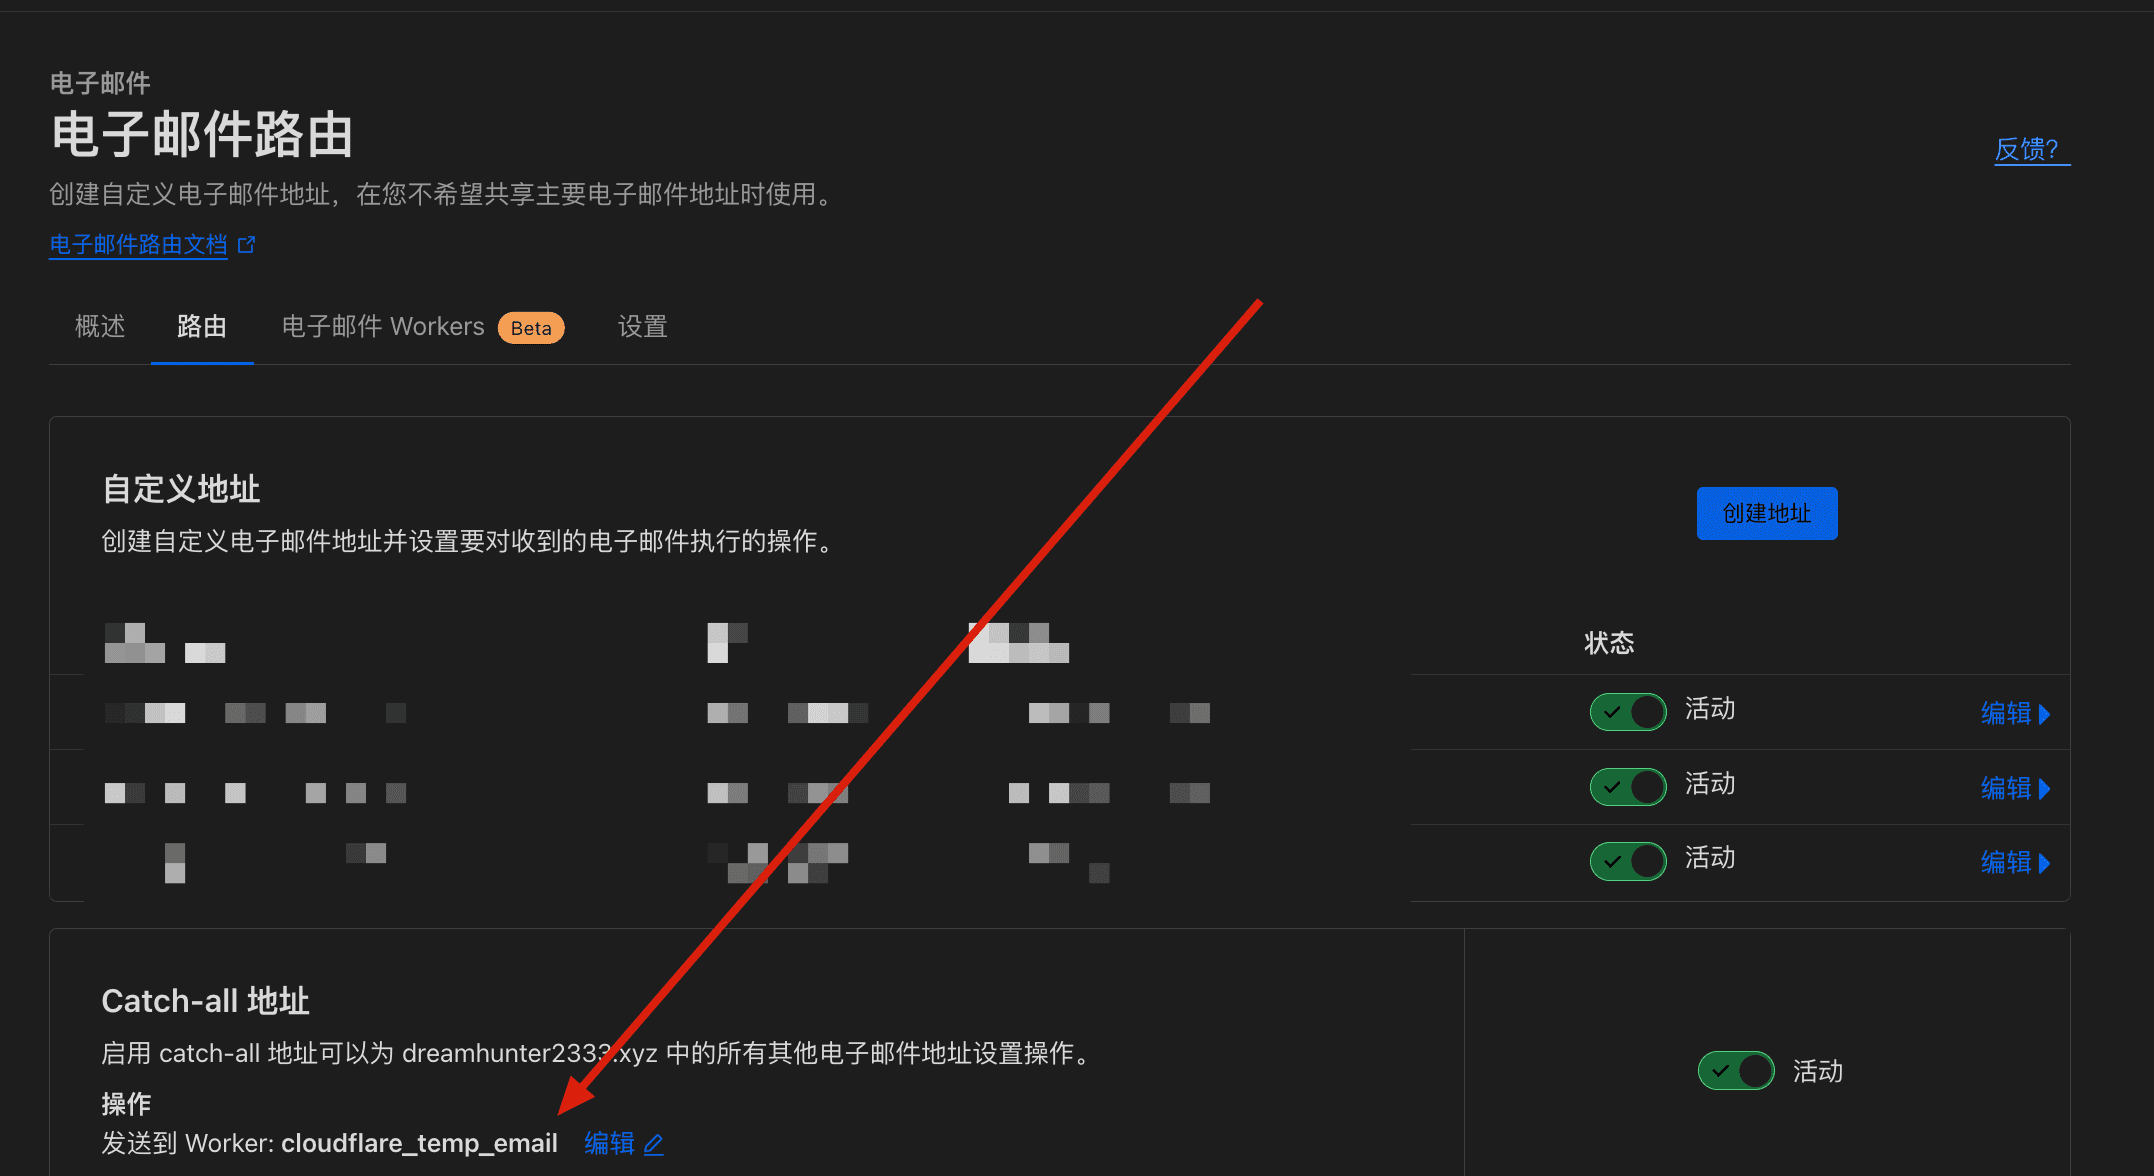
Cloudflare Email Routing
Before you can bind an email address to your Worker, you need to enable Email Routing and have at least one verified email address.
enable email route and config email forward catch-all to the worker
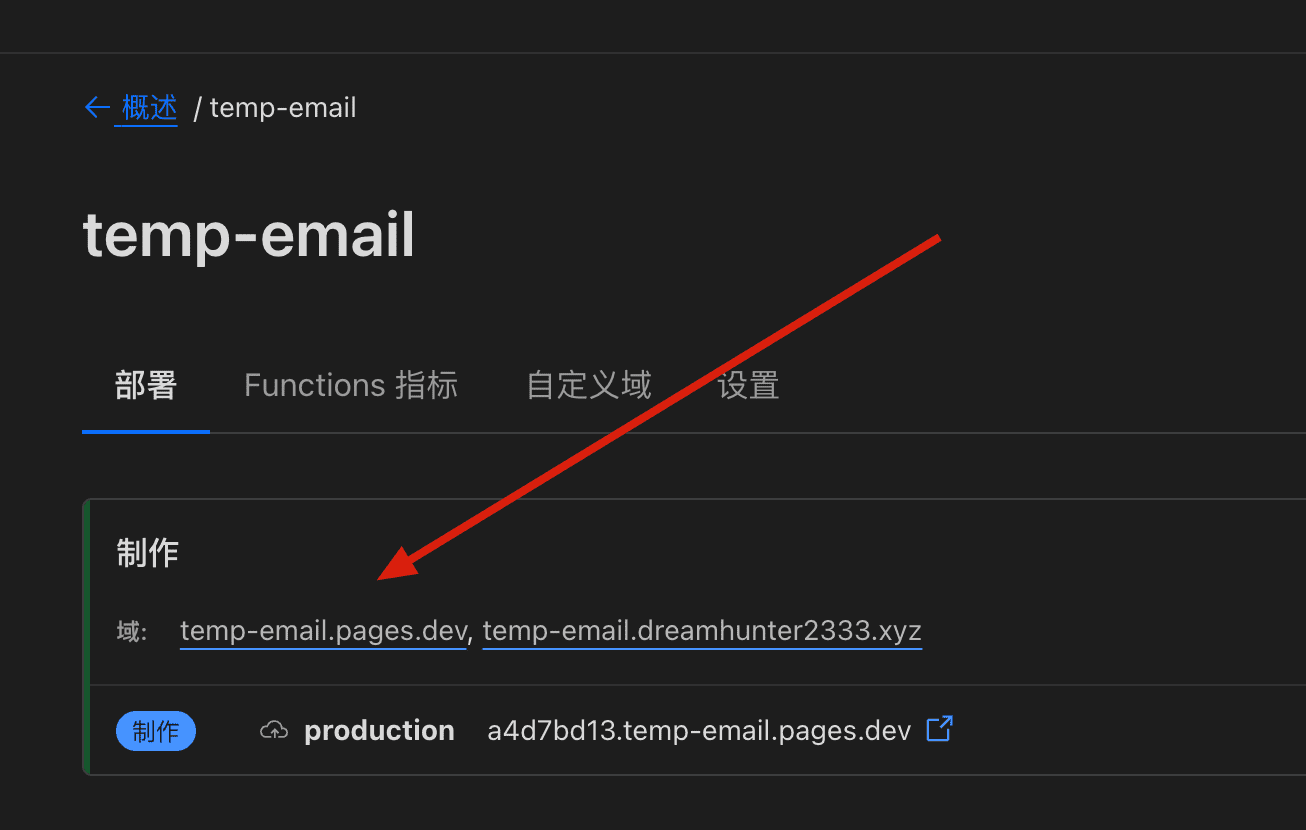
Frontend - Cloudflare pages
The first deployment will prompt you to create a project. Please fill in production for the production branch.
bash
cd frontend
pnpm install
# add .env.local and modify VITE_API_BASE to your worker's url
# VITE_API_BASE=https://xxx.xxx.workers.dev - don't put / in the end
cp .env.example .env.local
pnpm build --emptyOutDir
pnpm run deploy